6 August 2026
A Baby Elephant, Ears First
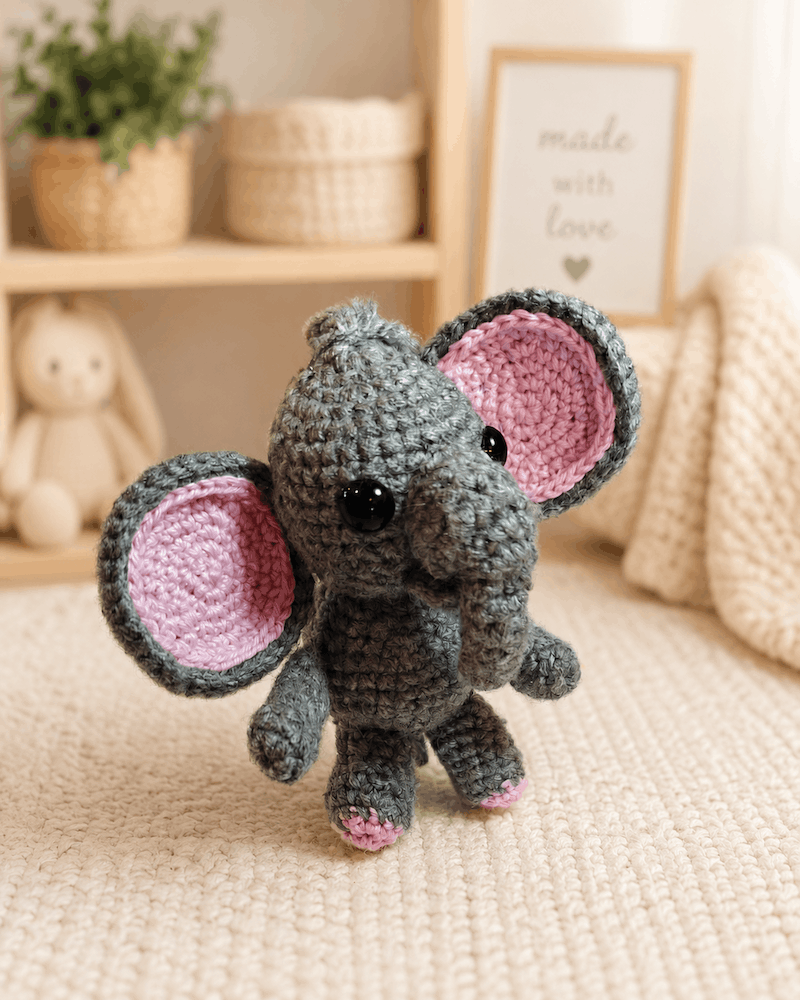
Soft grey, blush-pink ears and two tiny pink toes — our newest amigurumi is a baby elephant small enough to sit in your palm. Here is how those famous ears are made, and why this little fellow is our favourite "second amigurumi" project.
Ask anyone to draw an elephant and they will start with the ears. Ask a crocheter to make one, and the ears are where the whole personality lives — get them right and you have a baby elephant, get them wrong and you have a grey mouse.
Meet our newest studio resident: a palm-sized elephant in soft heathered grey, with blush-pink ear linings, a curled-up trunk, and two pink-tipped front toes. He now lives on the nursery shelf beside the bunny, and he has not stopped being picked up since.
Those ears are two circles in a trench coat
Each ear is worked as two flat discs — one grey, one pink, both crocheted in the round from a magic ring, increasing evenly so they lie perfectly flat. The pink disc is made a round smaller than the grey one. Then the two are held together and joined with a final round of grey worked through both layers at once.
That last round is the trick. It gives you a clean grey rim all the way around, hides every end, and — because you are working two fabrics into one — leaves the ear stiff enough to stand out from the head instead of drooping. Pinch the base of the ear as you sew it on, and it cups forward exactly the way a real one does.
Building the body
The rest is classic amigurumi, worked in continuous rounds of single crochet so there is no seam line running up the back:
- The head and body are one piece. Increase to a round head, work a few even rounds, decrease slightly at the neck, then increase again for the body. No joining seam means no wobbly neck.
- The trunk grows out of the face. It is worked as a narrow tube and curled upward while stuffing — barely any stuffing at the tip, so it holds a natural curve.
- Four legs, sewn on last. Short tubes, stuffed firmly at the base and left soft at the top so they sit flush against the body.
- Pink toe tips. A single colour change in the last two rounds of the front legs. It takes thirty seconds and it is the detail everyone notices.
Stuff it firmer than feels right
The most common note we give students on their first animal: you have not used enough stuffing. Amigurumi is worked at a tight tension precisely so it can be packed firm without the filling showing through the stitches. A softly stuffed elephant slumps at the neck within a week. A firmly stuffed one still stands up straight a year later.
The other note is about the eyes. This one has glossy black safety eyes, which are fastened from the inside before stuffing — wonderful for shelf pieces and older children. If the elephant is destined for a baby, swap them for embroidered eyes in black yarn. Nothing to work loose, nothing to lose.
Why we recommend it as a second project
We often hand this one to students who have finished their first ball-shaped make and want something with actual character. It is the perfect step up:
- Increases and decreases now have to shape something recognisable, not just a sphere.
- It introduces colour changes (the pink toes) without a full colourwork chart.
- It teaches assembly — pinning limbs on, standing the piece up, adjusting, and only then sewing. Placement is a skill of its own, and it is what makes a handmade toy look intentional.
- It is small. A whole elephant, start to finish, in a couple of sittings.
He measures barely five inches tall, took an evening and a half, and has already been requested three times. 🐘
Want to make one for a nursery you know? Register your interest — we will take you from your first magic ring to your first amigurumi, ears and all.